Finished size basket is 8" square
Supplies
1/2 yard Fabric
(interior)
1/2 yard fabric
(exterior)
1/2 yard fusible batting
Cut one 9" x
26" rectangle from interior fabric, exterior fabric and batting (this allows for 1/2" seams)
*If you want a bigger or smaller basket here is the formula I used to get my measurements. 8 (for side) +1 (for seams) + 8 (for bottom - no seams needed) + 8 (for other side) + 1 (for seams) = 26"
Cut two 9" x 9" squares for side pieces from interior fabric, exterior fabric and batting
(I used a contrasting fabric for exterior side panels)*For exterior pieces I used a 1/2" seam allowance.
*For interior pieces and batting I used a 5/8" seam allowance.
Stitch the side
pieces onto the main rectangle. measure down 8" from the end to get your
starting spot - do for interior, exterior and batting.
Fold in half on the
diagonal and stitch outside edges together only - this is how the box will start to form
For the interior, this is when you will attach the batting to the interior piece. I used iron on fusible batting with fusible side out so it could later be ironed to the exterior fabric and held in place. Layer the interior and batting pieces together (back side of interior to right side of batting) and then fold in half (with batting as outer layer) and sew through all 4 layers.
Now 2 corners of
the box have been created. Stitch together the other 2 corners by pinning the
edges together and stitching
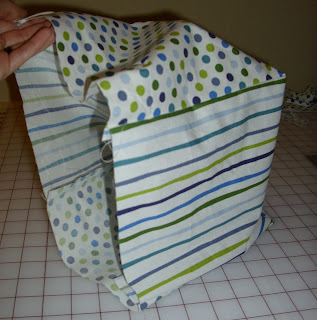
Now you have a box
shape
Stuff the
interior fabric into the exterior (back side to back side)
I then trimmed up the top edge so I could easily fold and iron my top seam.
Next I ironed the box so it would have crisp corners and I activated the fusible interfacing by carefully ironing each side of the box.
Create the top edge
by ironing down the exterior fabric over the interior fabric 2 times to get a finished edge. Pin in place and then stitch.
Pull your threads through to the interior and tie off.
All Done :)


No comments:
Post a Comment