
Wednesday, May 30, 2012
Nursery Design & Moses Basket Revamp
I am currently working
on a nursery design for some friends and interior design clients. I'll just go
ahead and say it's going to be a pretty awesome nursery! The good thing for me
about knowing how to sew and being a designer is that I can actually make some
of the items I recommend for my designs. I love having the opportunity
to be a part of the entire process.
The Inspiration
My client has
referred to the baby as their lil acorn for a while and this was the start of
our inspiration for the design. While browsing etsy one day I came across an
acorn ring and then a bookshelf that was a tree (from the same shop) and the
design started to form. We knew we wanted some kind of tree on the wall to
serve as a bookshelf next to the crib. And they knew the nursery would be blue
since its a baby boy :) Then I found this modern zoo fabric that I knew was
exactly where the design needed to come from! See for yourself the preliminary
sketches for the nursery.


We've found some pretty perfect stuff on Etsy,
including a crib sheet and vinyl wall decals (image below) that were literally meant to be
for the design.

I'm also working on making a few projects for the nursery. One of
which they commissioned me to do, revamp a Moses basket. Here's what I came up with.


And here are some custom burp cloths I made for them :)

Monday, May 28, 2012
Fabric Basket Tutorial
Finished size basket is 8" square

Supplies
1/2 yard Fabric
(interior)
1/2 yard fabric
(exterior)
1/2 yard fusible batting
Cut one 9" x
26" rectangle from interior fabric, exterior fabric and batting (this allows for 1/2" seams)
*If you want a bigger or smaller basket here is the formula I used to get my measurements. 8 (for side) +1 (for seams) + 8 (for bottom - no seams needed) + 8 (for other side) + 1 (for seams) = 26"
Cut two 9" x 9" squares for side pieces from interior fabric, exterior fabric and batting
(I used a contrasting fabric for exterior side panels)*For exterior pieces I used a 1/2" seam allowance.
*For interior pieces and batting I used a 5/8" seam allowance.


Stitch the side
pieces onto the main rectangle. measure down 8" from the end to get your
starting spot - do for interior, exterior and batting.


Fold in half on the
diagonal and stitch outside edges together only - this is how the box will start to form

For the interior, this is when you will attach the batting to the interior piece. I used iron on fusible batting with fusible side out so it could later be ironed to the exterior fabric and held in place. Layer the interior and batting pieces together (back side of interior to right side of batting) and then fold in half (with batting as outer layer) and sew through all 4 layers.


Now 2 corners of
the box have been created. Stitch together the other 2 corners by pinning the
edges together and stitching


Now you have a box
shape
Stuff the
interior fabric into the exterior (back side to back side)


I then trimmed up the top edge so I could easily fold and iron my top seam.

Next I ironed the box so it would have crisp corners and I activated the fusible interfacing by carefully ironing each side of the box.


Create the top edge
by ironing down the exterior fabric over the interior fabric 2 times to get a finished edge. Pin in place and then stitch.


Pull your threads through to the interior and tie off.

All Done :)

Thursday, May 24, 2012
Clutches
Clutches
seems to be all the rage right now. They have been a top fashion trend for the
past few seasons. Accessories are a great way to spruce up your wardrobe with
trendy items and not break the bank. You can never go wrong with Classic
clothing items. Add a bright pair of heels, bangles and a clutch and you're
ready to go! I wanted to share with you some of Dots & Damask's (my
business) clutch designs.
Envelope Clutch
Heavy
weight damask canvas with magnetic snap closure and lined interior. This is
great for a more casual night out or daytime look. It's even a perfect size for
an adorable diaper clutch for those mom's reading.


Wristlet Faux Leather Clutch
Faux leather with magnetic snap closure and lined interior. These are
great because of the bright color options that are right on trend this season.
With the variety of color options available these could come in handy for lots
of occasions - Girls night out, date night, FSU game day, birthday gift for
your BFF.

Fold-over Leather
Clutch (coming soon)
There are 2 options here, leather clutch with lined
interior and contrasting zipper closure. Or my take on color blocking with a
reversible design, leather on one side, cotton on the other with lined interior
and contrasting zipper.


Tuesday, May 22, 2012
Miccosukee Root Cellar
My sis-in-law is in town visiting from Asheville so we decided to go out for a drink. We came to a new(er) restaurant/bar, Miccosukee Root Cellar. It's Tallahassee first farm to table restaurant. Their menu says they source most of their foods from the local farming community and focus on fresh, chemical free foods. I can't wait to come back to try the food! The menu looks delicious and is very reasonably priced. Had we realized the restaurant was open we would have eaten here. They have local featured farms and seasonal fare. Some of the farms include Turkey Hill, Sweet Grass Dairy, Full Earth, Orchard Pond Organics, KBH, Bumpy Road and Crescent Moon. They also have a great selection of regional craft beer and wine.
What I want to try:
Bread Board with herb butter
Lemony Kale Salad
Rosemary Chicken Rillettes
House-made Organic Grapefruit Sorbet
Check out their website and restaurant!
http://miccosukeerootcellar.com/


What I want to try:
Bread Board with herb butter
Lemony Kale Salad
Rosemary Chicken Rillettes
House-made Organic Grapefruit Sorbet
Check out their website and restaurant!
http://miccosukeerootcellar.com/
Monday, May 21, 2012
Mini Pies

I saw these cute little pies on Pinterest today and decided to make them for dessert tonight. I made a variety of Peach, Strawberry & Apple Pies using organic ingredients. They turned out really cute. I used ready made crust, because I didn't have time to make the crust from scratch. They were all about the same base:
2 cups organic chopped fruit
1/4 cup organic sugar in the raw (brown sugar for apples)
1/4 cup water
1/4 cup organic butter
1 tbsp lemon/lime juice
1 tbsp coconut flour (for thickening)
1/4 tsp vanilla extract
1/2 tsp cinnamon (apple pie space for apples)
First I cooked the fruit fillings (in 3 separate pots) with all the ingredients until the fruit was soft and the sauce was thickened. Then I used a drink shaker to cut out the bottom piece of the pie and then a drinking cup for the top pieces. Brush an egg wash (1 egg + 1 tbsp water) inside the pie on the shell to help keep it from getting soggy during cooking, and then brush it on top of the outer crust. Fill pie shell with fruit mixture. I didn't have any small cookie cutters so I had to free hand the designs for the top with a paring knife. I used refined coconut oil to coat my muffin pan so I cooked the pies at 365 degrees since that's the highest heat the coconut oil can take. They cooked for 18 minutes. They were pretty tasty :)


Saturday, May 19, 2012
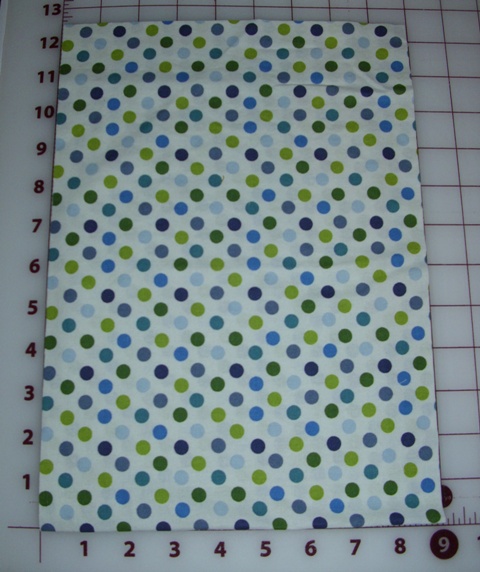
Sewing 101
Today I taught a basic sewing class to a few girl friends (with the help of my mom). Each one of us made a set of placemats. I choose this item for the class because although very basic and easy to make, it has a lot of great basic skills that goes into the construction. Plus, everyone would leave with an item they could display in their house. Here are some pictures from the class.
(Tutorial below so you can make your own set!)


And... the finished products!


Reversible Placemat Tutorial
Supplies Needed
30" of fabric for one side of placemat
30 " of second fabric of other side
Coordinating thread
Scissors
Rotary Cutter & Straight Edge

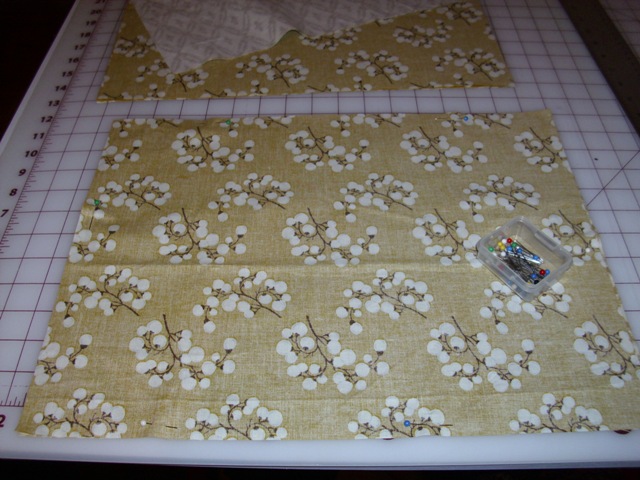
Fold first fabric into quarters.

Use rotary cutter & straight edge to cut a rectangle 18.5" x 12.5. Finshed size will be 18" x 12".
(My table is only 36" so I decided to make my finished size 16" x 12")
(My table is only 36" so I decided to make my finished size 16" x 12")


You will now have one side of all 4 placemats cut. Next do the same for the second fabric.


Now you have 8 rectangles 18.5" x 12.5" (4 of each fabric). Pin one of each fabric face to face for all 4 placemats. The fabric will be inside out for now.

Time for some sewing!

Sew with a 1/4" seam allowance. Start sewing on the short side in the middle of the seam and follow all the way around the perimeter. Back-stitch at the start, each corner and the end. It's ok to run over your stitches at the corners; this just adds more stability.You will need to stop short before closing the seam leaving a 3" opening. Repeat for all 4 placemats.


Clip all corners to remove some of the bulk so when you flip the placemat right-side out the corners will lay flat. (You can see in this picture what I meant by run over the corners - it will form a little x over the corner seams)

Gently pull the fabric through the 3" opening. Use a a stick or fabric turner tool to push out the edges (even a chop stick will work).


Repeat for all 4, until you have crisp pushed out corners.

Time to iron the edges. I like to roll the edge of the fabric between my fingers as I iron to make sure the seam is pulled all the way out.
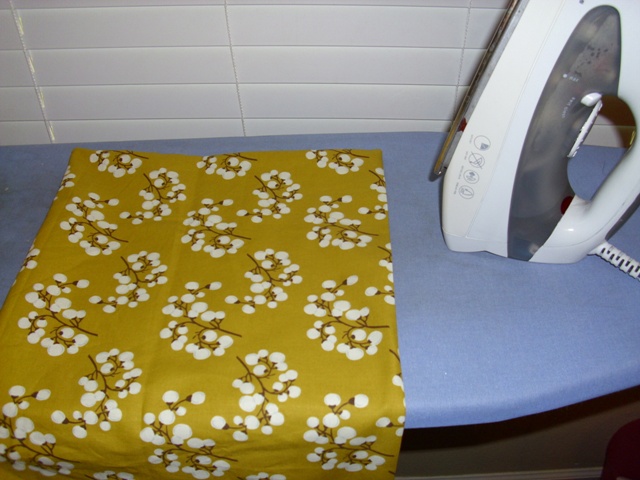


Make sure to iron down the opening as well. The cut edge will already be folded inside, just line up the ironed edge with the ironed sewn seam.

Next you will top-stitch around the edge of each placemat. I used slightly under a 1/4" seam allowance. Do not back-stitch or over stitch the corners. As you are sewing and come to the corner, slowly stitch to the edge leaving your seam allowance space unsewn. Make sure the needle is in the down position before you turn the corner. Repeat for all 4.

Gently pull on the threads on the "back" side of your placemat to pull the threads through. Tie off all threads and trim.


That's all!
This would make a wonderful housewarming gift for a friend.
*Tip: Roll up the placemats and then use a scrap of fabric to tie a bow around them.
This would make a wonderful housewarming gift for a friend.
*Tip: Roll up the placemats and then use a scrap of fabric to tie a bow around them.

Mix and match your placemats by alternating since they are reversible.
Or this is a great tutorial to make holiday placemats.
(Thanksgiving on one side and Christmas on the other)
Or this is a great tutorial to make holiday placemats.
(Thanksgiving on one side and Christmas on the other)

Subscribe to:
Posts (Atom)